


Linocut is both simple and economical, as it does not require a lot of materials. You’ll need a set of knives and/or gouges, a linocut plate, a rubber ink roller, linocut ink, a baren, a wooden wedge support and paper. Choose Speedball water-based linocut inks; they’re creamy, easy to wash and give very good results. The trickiest part of linocut is seeing your work backwards. Unlike drawing, whites are carved and raised lines are printed in ink. Once you overcome this small challenge, this technique becomes extremely fun and creative, allowing you to endlessly produce a multitude of customized patterns.
MATERIALS:
- Linocut Ink
- Linoleum plate
- Several types of knives and gouges
- One rubber roller
- One marker
- Papers
- A baren
- A wooden wedge support
Step 1:
Drawing the pattern on the linoleum plate: If the plate is dark, you can draw directly on it with permanent markers. If the plate is lighter, use a B or HB pencil, or transfer your sketch using carbon transfer paper. To begin, start by creating simple drawings; the more you explore this technique, the more you’ll be able to produce increasingly elaborate works, and discover patterns that allow you to translate light and shadow effects.
How to create negative images that are suitable for linocut: Drawing in white on black sheets can help you correctly visualize all your ideas. Be careful, linocut is highly addictive! Once you start, you won’t want to stop.

Step 2:
Creating the plate: Use gouges and/or knives to carve. Purchasing a set of two knives can be extremely convenient when using several blades at the same time. There are several types of knives and gouges; generally, U-shaped gouges are more or less wide and will be used to carve larger areas, while V-shaped gouges will be used for finer details.


Step 3:
Prepping and choosing papers for your matrix: Prepare several papers. You can eventually trace marked lines onto a piece of paper that will be placed underneath your plate; this will allow you to centre your surface when printing. For best results, choose papers that are acid-free, not too thick and fine-grained. Play with ink and paper colours: black ink on kraft paper, or red ink on white paper will greatly change the look of your creation. Enjoy endless possibilities!
Step 4:
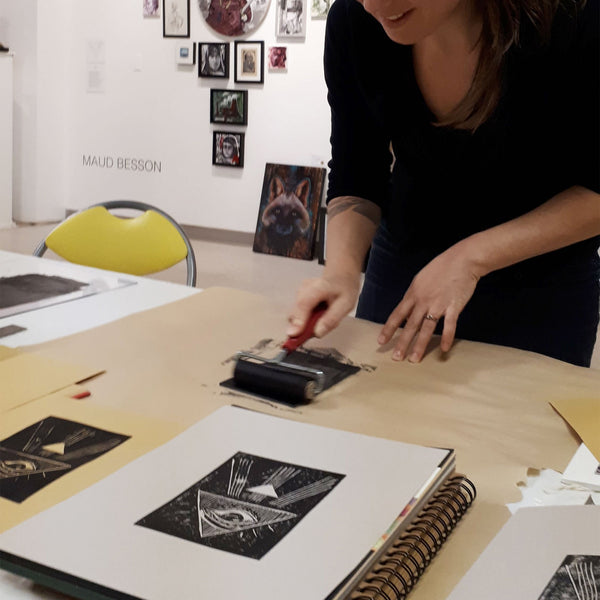
Ink application: Using a rubber ink roller, spread a small amount of ink on a piece of glass or plexiglass. Try to apply a smooth and homogeneous layer, and then ink your plate. Proceed quickly to prevent the ink from drying out. Apply the ink evenly over the entire linoleum plate.
Step 5:
Printing: Grab your paper and apply it to your previously inked lino plate. Rub vigorously with the baren; do not wait too long, the ink shouldn’t dry. Carefully remove the paper without moving too much (from right to left, or from top to bottom). Then let it dry for approximately 20 minutes.


Linocut plates: Speed Cut plates are very soft and easy to carve, but a little more fragile to use. Both soft and easy to carve, dark grey linoleum plates provide a strong and durable surface. Brown plates are much stronger, but slightly more difficult to carve and cut. However, they’re much more resistant over time and can withstand a large number of prints.
TIPS
- Don't forget that all your works will be printed backwards! Remember to reverse the designs, letters and words that you will carve onto your matrix.
- Be careful, never use acrylic or other inks that are not suitable for linocut. When inks are too liquid, dry too fast, are not opaque enough, or are too pasty, results will be disappointing! It’s best to always use inks that are adapted to this technique.