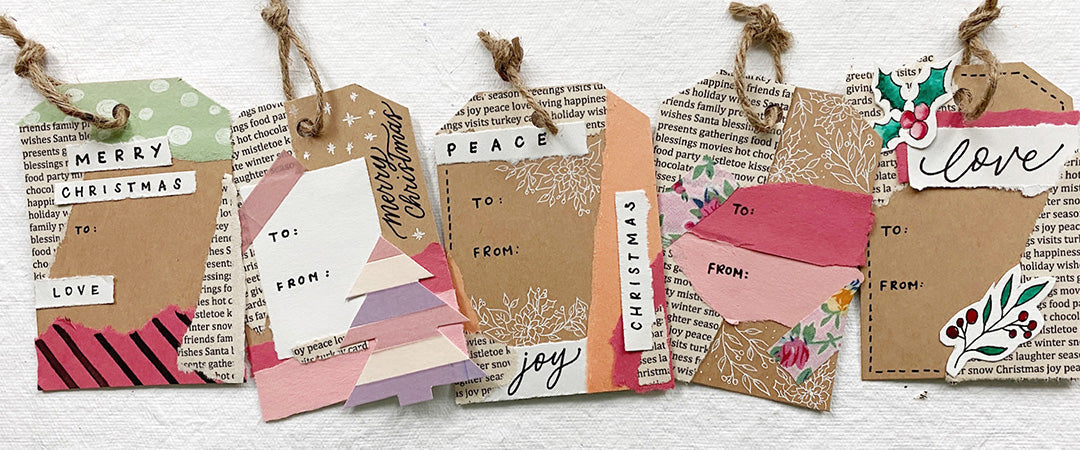
Have you ever been inspired by art materials you have at home? Or looked at an old pile of paper and had the sudden urge to make something new out of it? Artist Elizabeth Zhang of Calligraphie with Liz shares tips and tricks to breathe new life into recycled supplies. Using creative materials you already have on hand, you can do your bit for the environment by creating these beautiful, recycled gift tags for the holidays. Follow the guide!
A project by Elizabeth Zhang
MATERIALS:
- Kraft cardstock
- Glue
- Scissors
- Ruler
- Hole punch
- Twine/ribbon
- Old watercolour paper
- Paintbrush
- Watercolour
- Old book/newspaper
- Coloured cardstock scraps
- Washi tape
- Sakura Pigma Micron Pen (0.8 mm)
- Sakura Gelly Roll (White)

INSTRUCTIONS:
Step 1: Prepare the gift tag
Fold the kraft cardstock in half and add glue in the middle to glue both sides together. Using an old gift tag as a guide, trace the shape of the gift tag onto the cardstock and cut it out accordingly.


Step 2: Add embellishments to the gift tag
You can make various embellishments with supplies you already have at home.

2.1: Use an old book/newspaper
Tear out a page with words to use as embellishments. You can also type Christmas-related words on a Word document and print them on old, coloured paper.

2.2: Use coloured paper scraps from previous projects
Tear out different shapes and sizes to use as layers on the gift tag. You can either leave it as it is, or do one of the following:

- Add patterns to the coloured paper. Use a white pen/marker to draw polka dots, or use a black pen to draw stripes.

- Add words to the paper in different styles that you can tear/cut out later.
Tip: To get nice, deckled edges, I usually use a ruler and tear the paper with the front side facing down. Once you turn the paper over, you’ll be able to see the raw, deckled edges, which creates a rustic look!

2.3: Use old watercolour paper
I used watercolour paper that was previously used for a sketch. Using the clean side, draw a few Christmas elements using the Sakura Pigma Micron Pen (0.8 mm), and then paint them with watercolour. Once dry, cut out the different elements.


2.4: Washi tape
Using the leftover watercolour paper from 2.3, stick Washi tape onto the paper and cut out elements of your choice. I cut out a Christmas tree.

Step 3: Put it all together
This is the fun part! After you've created the different elements in Step 2, you can mix and match them to create fun designs! Use glue to layer them. The layered effect creates more visual interest.

Step 4: Add more details
Once everything is put together, you can add words, flowers or stars to fill in empty spaces on the gift tag! Add a string and your gift tag is ready!


