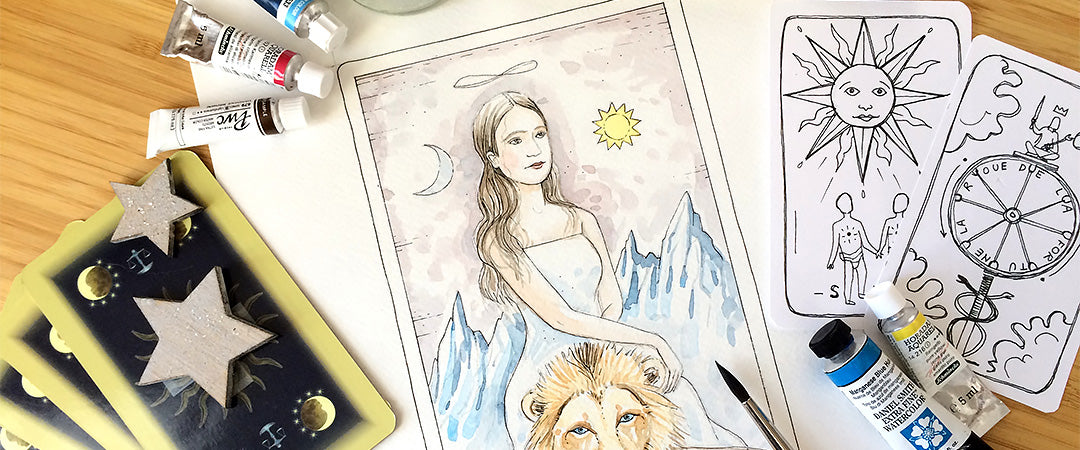
Create a tarot card in just a few easy steps thanks to this creative project by artist Maud Besson. Using fine black markers, drawing and watercolour techniques, you’ll learn how to make beautiful tarot cards inspired by the Tarot de Marseille and its symbolism. Step by step, Maud will show you all her techniques!
Materials:
- Watercolour paper (300 g)
- Watercolour brush
- HB pencil
- Eraser
- Micron Pigma pen
- Watercolour of your choice

Instructions:
Step 1: Getting inspired
Which tarot card inspires you the most? Maud chose the Strength card; this arcana is one of the master cards of the Tarot de Marseille. A symbol of courage and determination, the Strength card also embodies femininity. To begin, Maud chose the symbols she wanted to depict: a woman and a lion. You can easily find inspiration on websites that offer royalty-free images like pexels.com or unsplash.com. These websites provide the names of photographers and even allow you to send them donations, so they’re great for finding photo references for painting or drawing, while supporting the photographers, too.
Step 2: Drawing
Determine the size of your tarot card; feel free to make it larger, as this will allow you to add more detail. Maud chose to make hers 5 x 8 in. Draw lightly on a sheet of watercolour paper (300 g minimum thickness) using a HB or H pencil. Start with simple shapes, possibly inspired by your photo references. Erase any lines you won’t use before moving on to the watercolour step.


Step 3: Watercolour
Stretch your paper over a masonite board with low-tack masking tape. This step is essential as it will prevent your paper from curling up too much as you work. Grab your favourite watercolour palette and some suitable brushes. A dozen or more colours should suffice; as for brushes, Maud suggests a small to medium-sized brush, as well as a very fine brush. Her favourite brushes? Raphaël Softaqua; she used the number 10 brush (R845-10).
Start by choosing your colours; what mood do you want to give to your image? A little tip before you start: test all your colours on a piece of paper before applying them to your work. This avoids unpleasant surprises, or applying colours that may be too bright or not bright enough. Maud always applies warmer colours first, such as yellows and oranges; she then applies colder colours such as blues and greens (yellows get dirty easily, so apply them first). When creating this kind of precise illustration, Maud prefers to work on dry paper, to better control this rather unpredictable medium. That said, don't forget that the beauty of watercolour lies in all its little imperfections.


Step 4: Adding details with a fine black marker
Once your watercolour is dry (use a hair dryer if needed), draw your main lines with a very fine black marker. Maud used a 0.2; she loves Micron markers, but she also likes Molotow markers, which she finds to be of good quality. What is special about these markers? They can be combined with watercolours because they don't smudge. They are highly pigmented, lightfast and do not bleed onto the paper. Feel free to add hatching and small dots to create shadows and highlights.

Step 5: What’s next...
You can name your arcane using the font of your choice, which you can draw, for example, on the bottom of your card or on the side. You can also scan your creation and print it on smooth, slightly thick card stock. What's next? Repeat all these steps as many times as you like to create your own tarot deck. A fun and exciting project!


