Have you ever stood in awe of a glossy work of art? Thanks to its remarkable shine, resin gives any creative project a luxurious and lasting finish. Do you believe this tricky product is only for seasoned artists who exhibit in large galleries? Well, think again: resin is for all creatives!

What is epoxy resin?
Epoxy resin is a synthetic product made up of two components: an activator and a hardener. When combined, a chemical reaction occurs, which causes the product to harden within a few hours. The mixing ratio between the two components will vary depending on the type of resin used (often 1:1, sometimes 2:1). It’s therefore important to read the manufacturer's label carefully in order to respect the mixing ratio.
When used as is, resin is translucent. However, it can also be coloured to obtain results ranging from light to completely opaque. Several resins have their own colouring agent and offer a variety of colours and pigments. Even metallic effects can be achieved! Just make sure you respect the saturation point when using a colouring product with resin, which is often around +5%.

How to choose the right resin
The resin you choose will depend on your project. Do you want to apply it as a varnish to give your artwork a glossy effect? Do you want to cast a small item? Do you want to create a "dome" effect over a small surface or on jewellery? Are you looking for an odourless, fume-free and bio-based resin? Or maybe a food-safe resin? Are you looking for a fast-drying resin, or one that produces less bubbles? Will you be pouring it onto canvas, wood, photos, paper? All resins have distinctive qualities to meet your specific needs. Our in-store experts will happily guide you towards the right brand for your project!
What tools are needed to work with resin?
First, make sure your workspace is well protected and covered with a plastic sheet or waterproof paper. Once dry, resin is highly resistant, so it will be very difficult to remove drops that may have accidentally fallen during your creative process.
Your workspace should be well ventilated. In its liquid state, resin may produce harmful odours or fumes. We recommend wearing a respirator mask with most resins; however, some are manufactured with safer ingredients and therefore do not require such precautions. In all cases, read the safety recommendations on the packaging and wear latex gloves to avoid direct skin contact.

Since the activator and hardener must be mixed according to a precise ratio, you will need to work with graduated or transparent containers to measure quantities. To find out how much resin you need to cover your surface, you can use a calculator like the one on the Art Resin website.
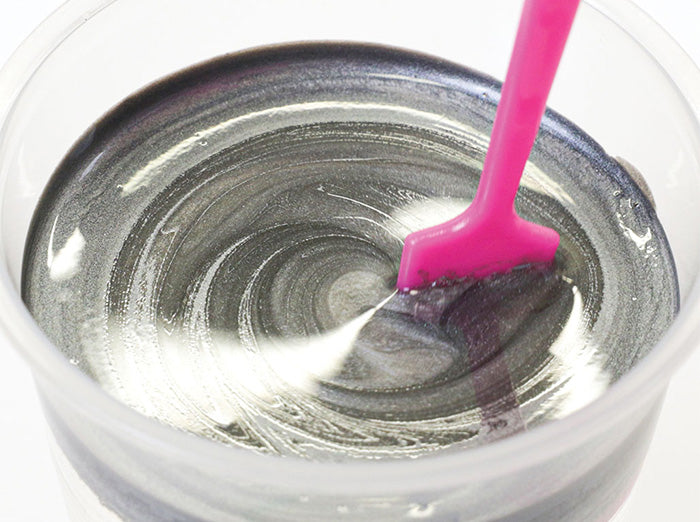
Sticks (wooden, plastic or silicone) are useful for stirring the product to obtain a homogeneous mixture. Stir for at least 3 minutes, scraping the sides of the container in which the resin is prepared.
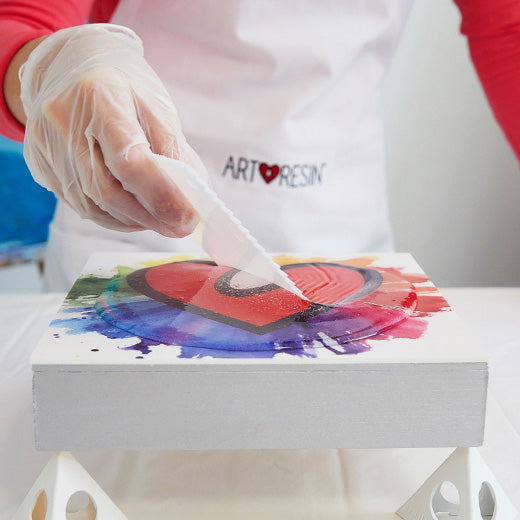
Finally, a plastic spatula or a silicone scraper is recommended when pouring the resin in order to move or distribute it evenly over your project.
Some resin accessory kits will provide you with all the necessary materials:


Tips and tricks for perfect results
Room temperature: Make sure to work in an environment where both humidity and temperature are well controlled. Keep in mind that resin will cure faster in a warmer environment, and slower in a cooler one.
Bubbles: Bubbles often appear at the stirring stage; this is a normal phenomenon that occurs when oxygen particles enter the mixture. Some resins have a component that helps bubbles move to the surface so that they burst and disappear, but sometimes, this isn’t enough to completely remove them. So here are some additional tips: when pouring the resin, bring it as close as possible to the surface you are pouring it on. Let it sit for a few minutes to allow air bubbles to rise, then use a heat gun to remove them.
For best results, finish off with a butane torch to burn off any hair or dust particles that may land on the project before the resin has set. Be careful not to apply too much heat, as this can damage the resin and cause premature yellowing. Be sure to protect your artwork while it dries, keeping it away from dust (and curious hands wanting to see if it has hardened after a few hours!) And that’s it, you're done!
To learn more, you can read the following article:
7 questions about ArtResin | DeSerres