


Looking for a new creative activity to keep the family busy? Here is an easy DIY craft project that you can do all together — and you can even use the final art piece to decorate your home!
MATERIALS:
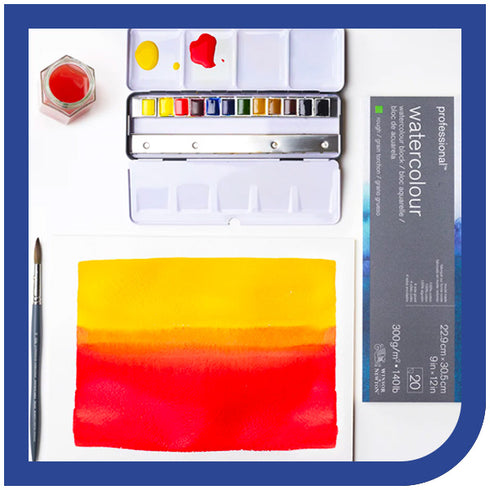
- Watercolour paper
- Watercolour set
- Paintbrushes
- Masking tape
- Jar of water
- Paper towels
INSTRUCTIONS:
Step 1
Get your supplies ready! Cut your watercolour paper to a size 8 x 10 in.
Note: You can cut your paper to any size in order to fit the frames you have.
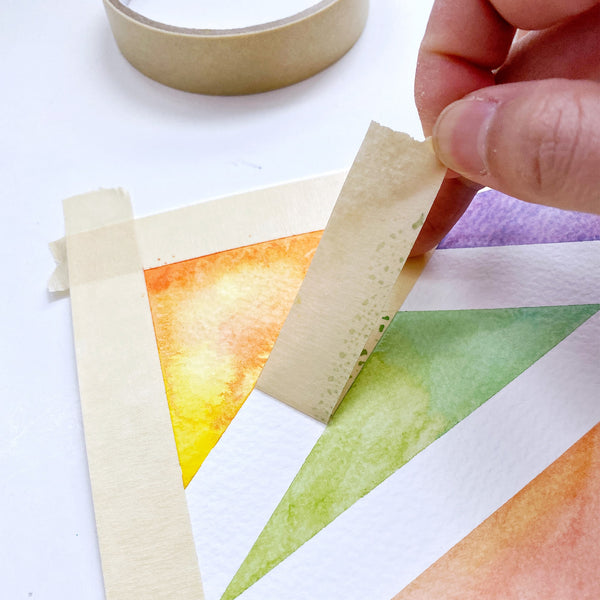
Step 2
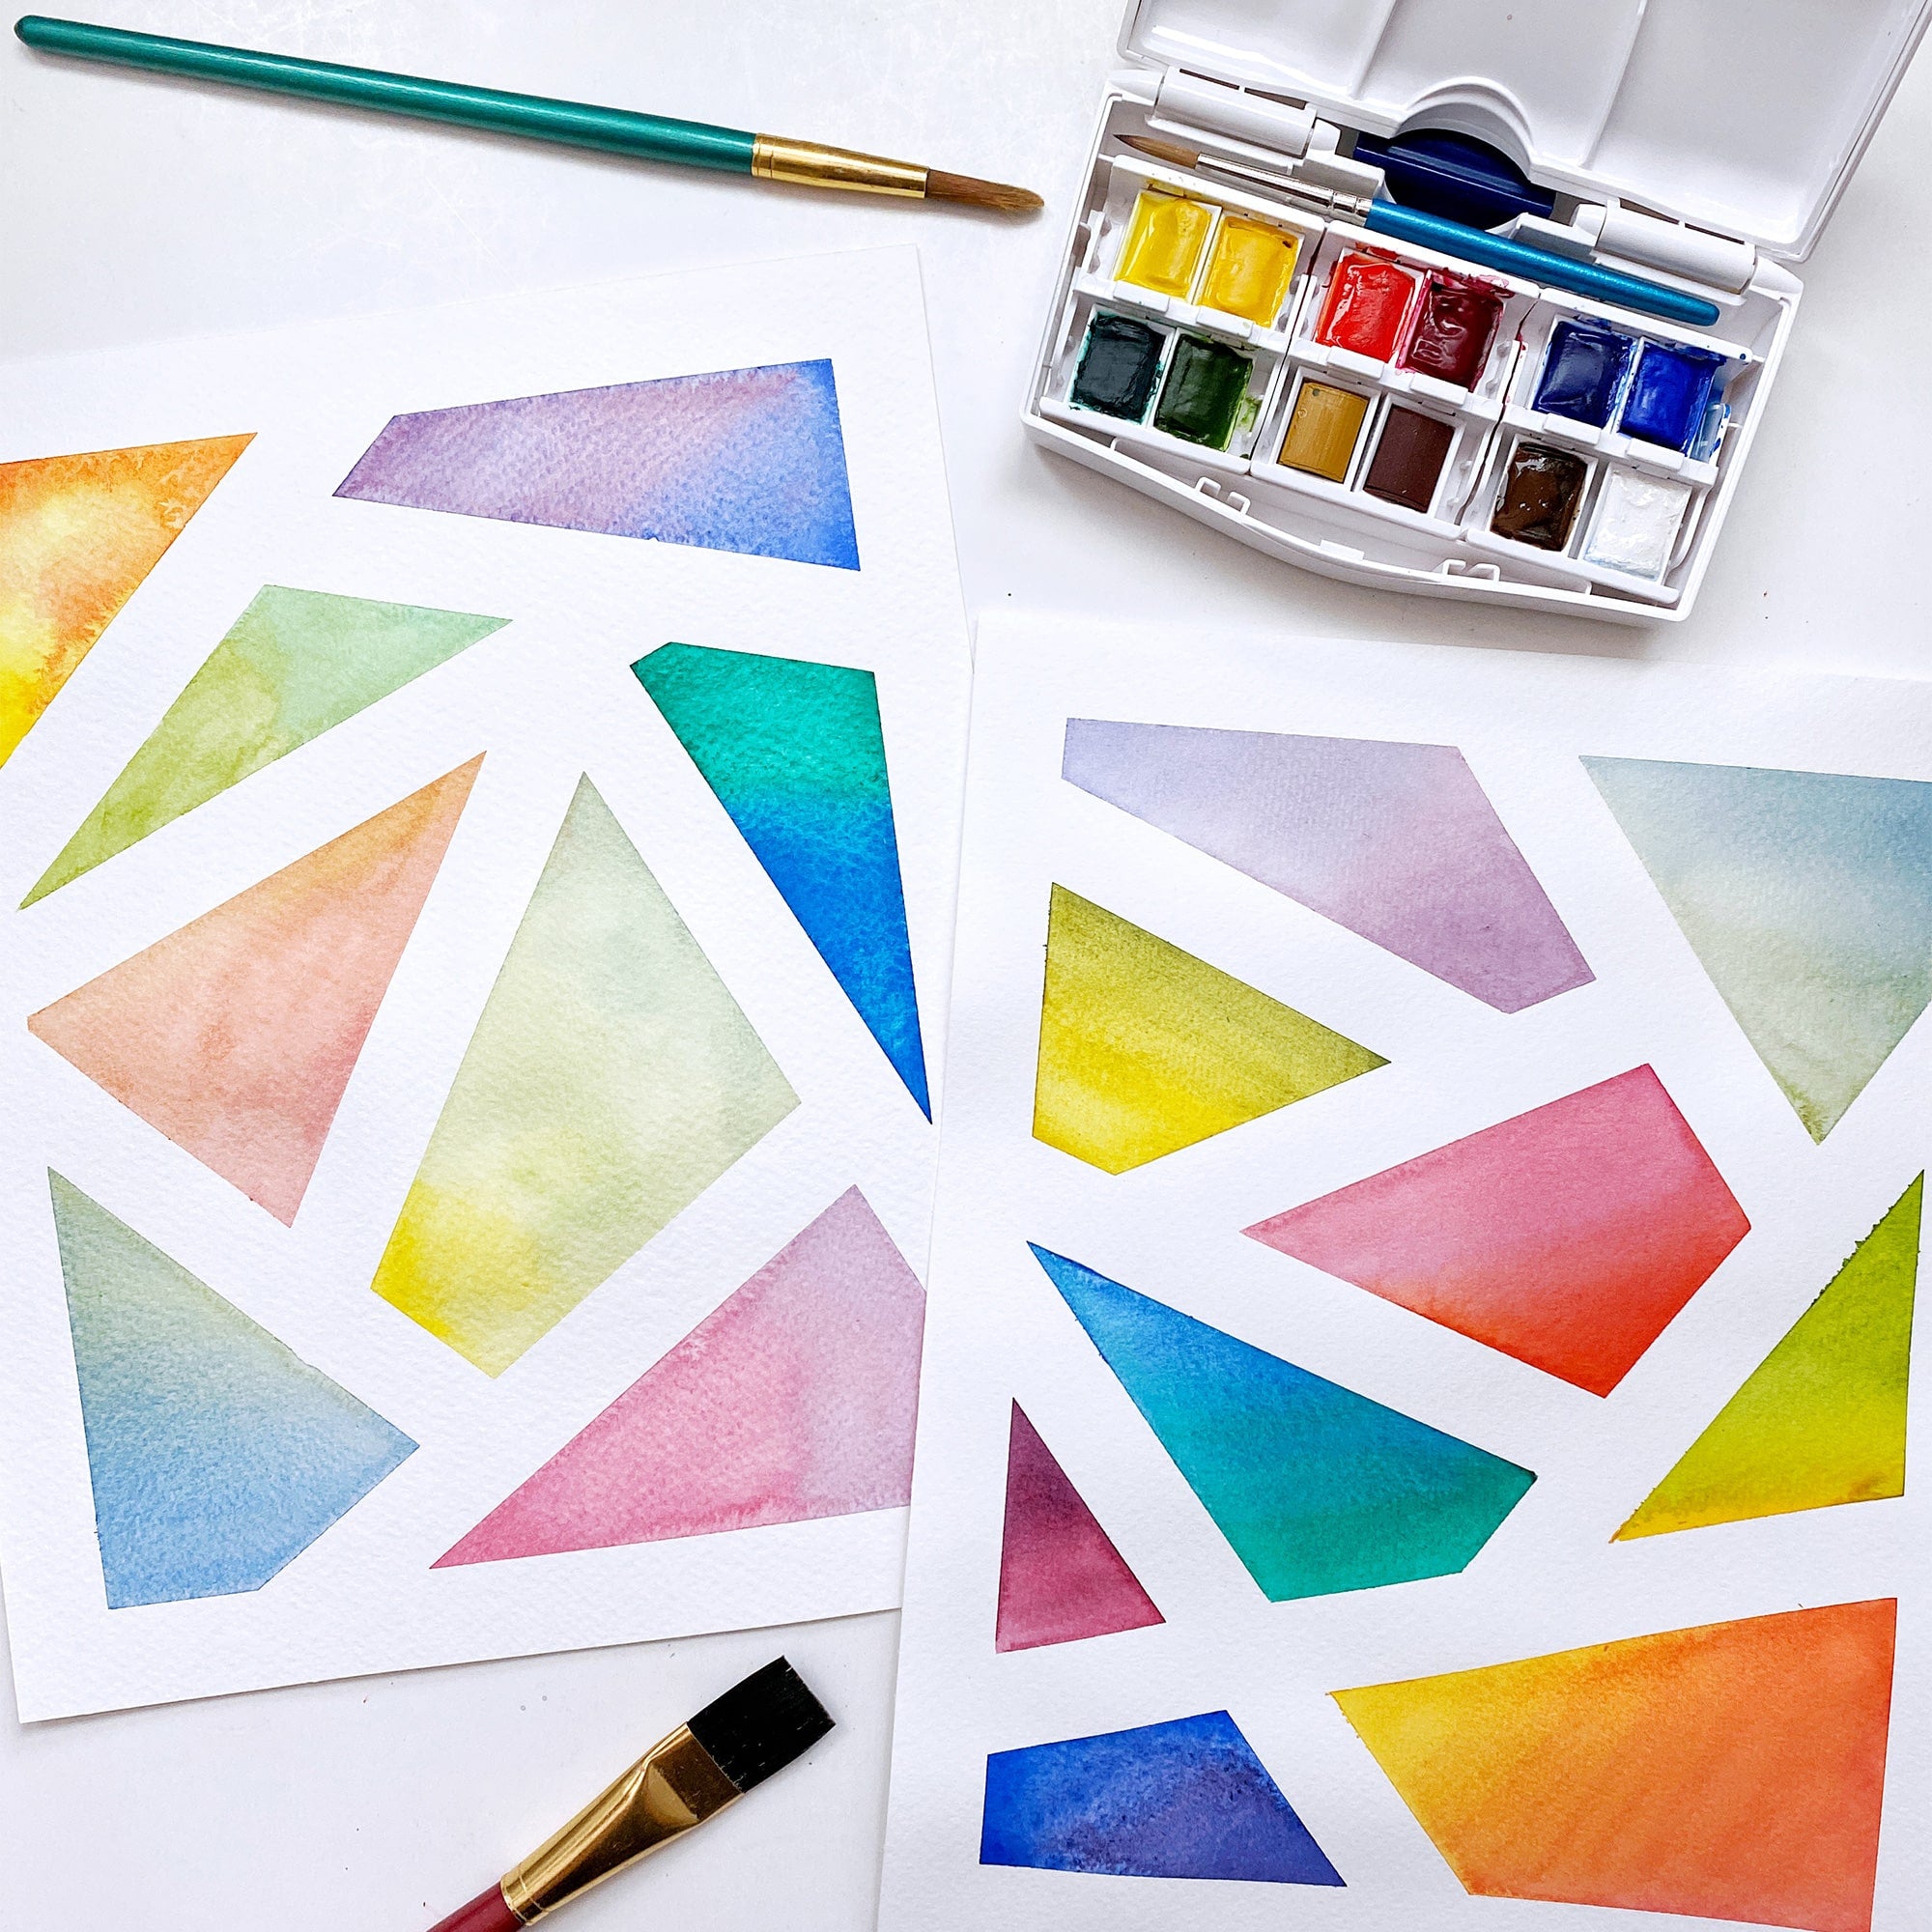
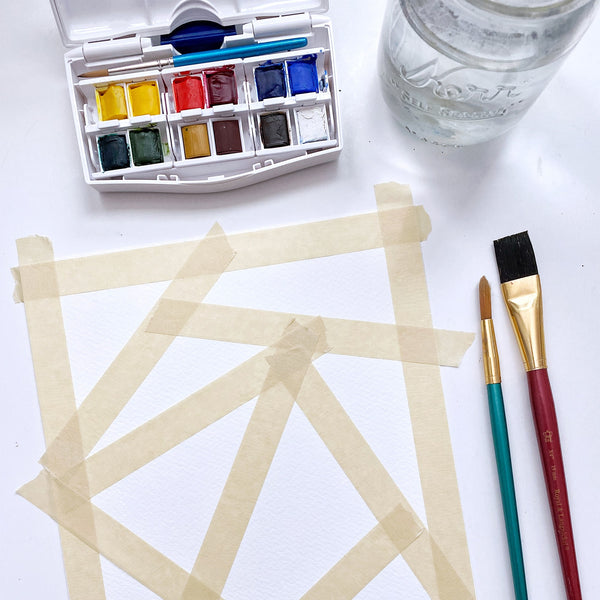
Start by taping the borders of your paper. Then, cut smaller lengths of tape to split the paper up into different sections, ensuring that the tape is firmly pressed down onto the paper. This prevents water or paint from leaking through the tape. You can be as creative as you want here!
Step 3
Activate your watercolour palette with drops of water.
Step 4
Start applying paint using the following techniques (choose one or both):
1. Wet-on-wet technique
- Using a paintbrush, apply water to a section.
- Add drops of paint in different colours and watch them blend together!
2 - Wet-on-dry technique
- Using a paintbrush, apply paint directly to a dry section.
- Add a second colour to the section and blend together with a paintbrush!
Step 5
Fill in all sections with the colours of your choice. It is best to choose colours that blend well together (e.g. Yellow + Green, Yellow + Red, Purple + Blue, etc.).

Step 6
Once your painting is dry, remove the masking tape to reveal your final wall art!