


Keep your children busy during school holidays with this easy DIY project – a great introduction to embroidery! I invite you to search for goodies in your recycling bin (who’s looking, right?) and give a second life to old packaging supplies. Once completed, their beautiful embroidery projects will quickly find their place in your home decor … because as the saying goes: "Nothing is lost, nothing is created, everything is transformed."
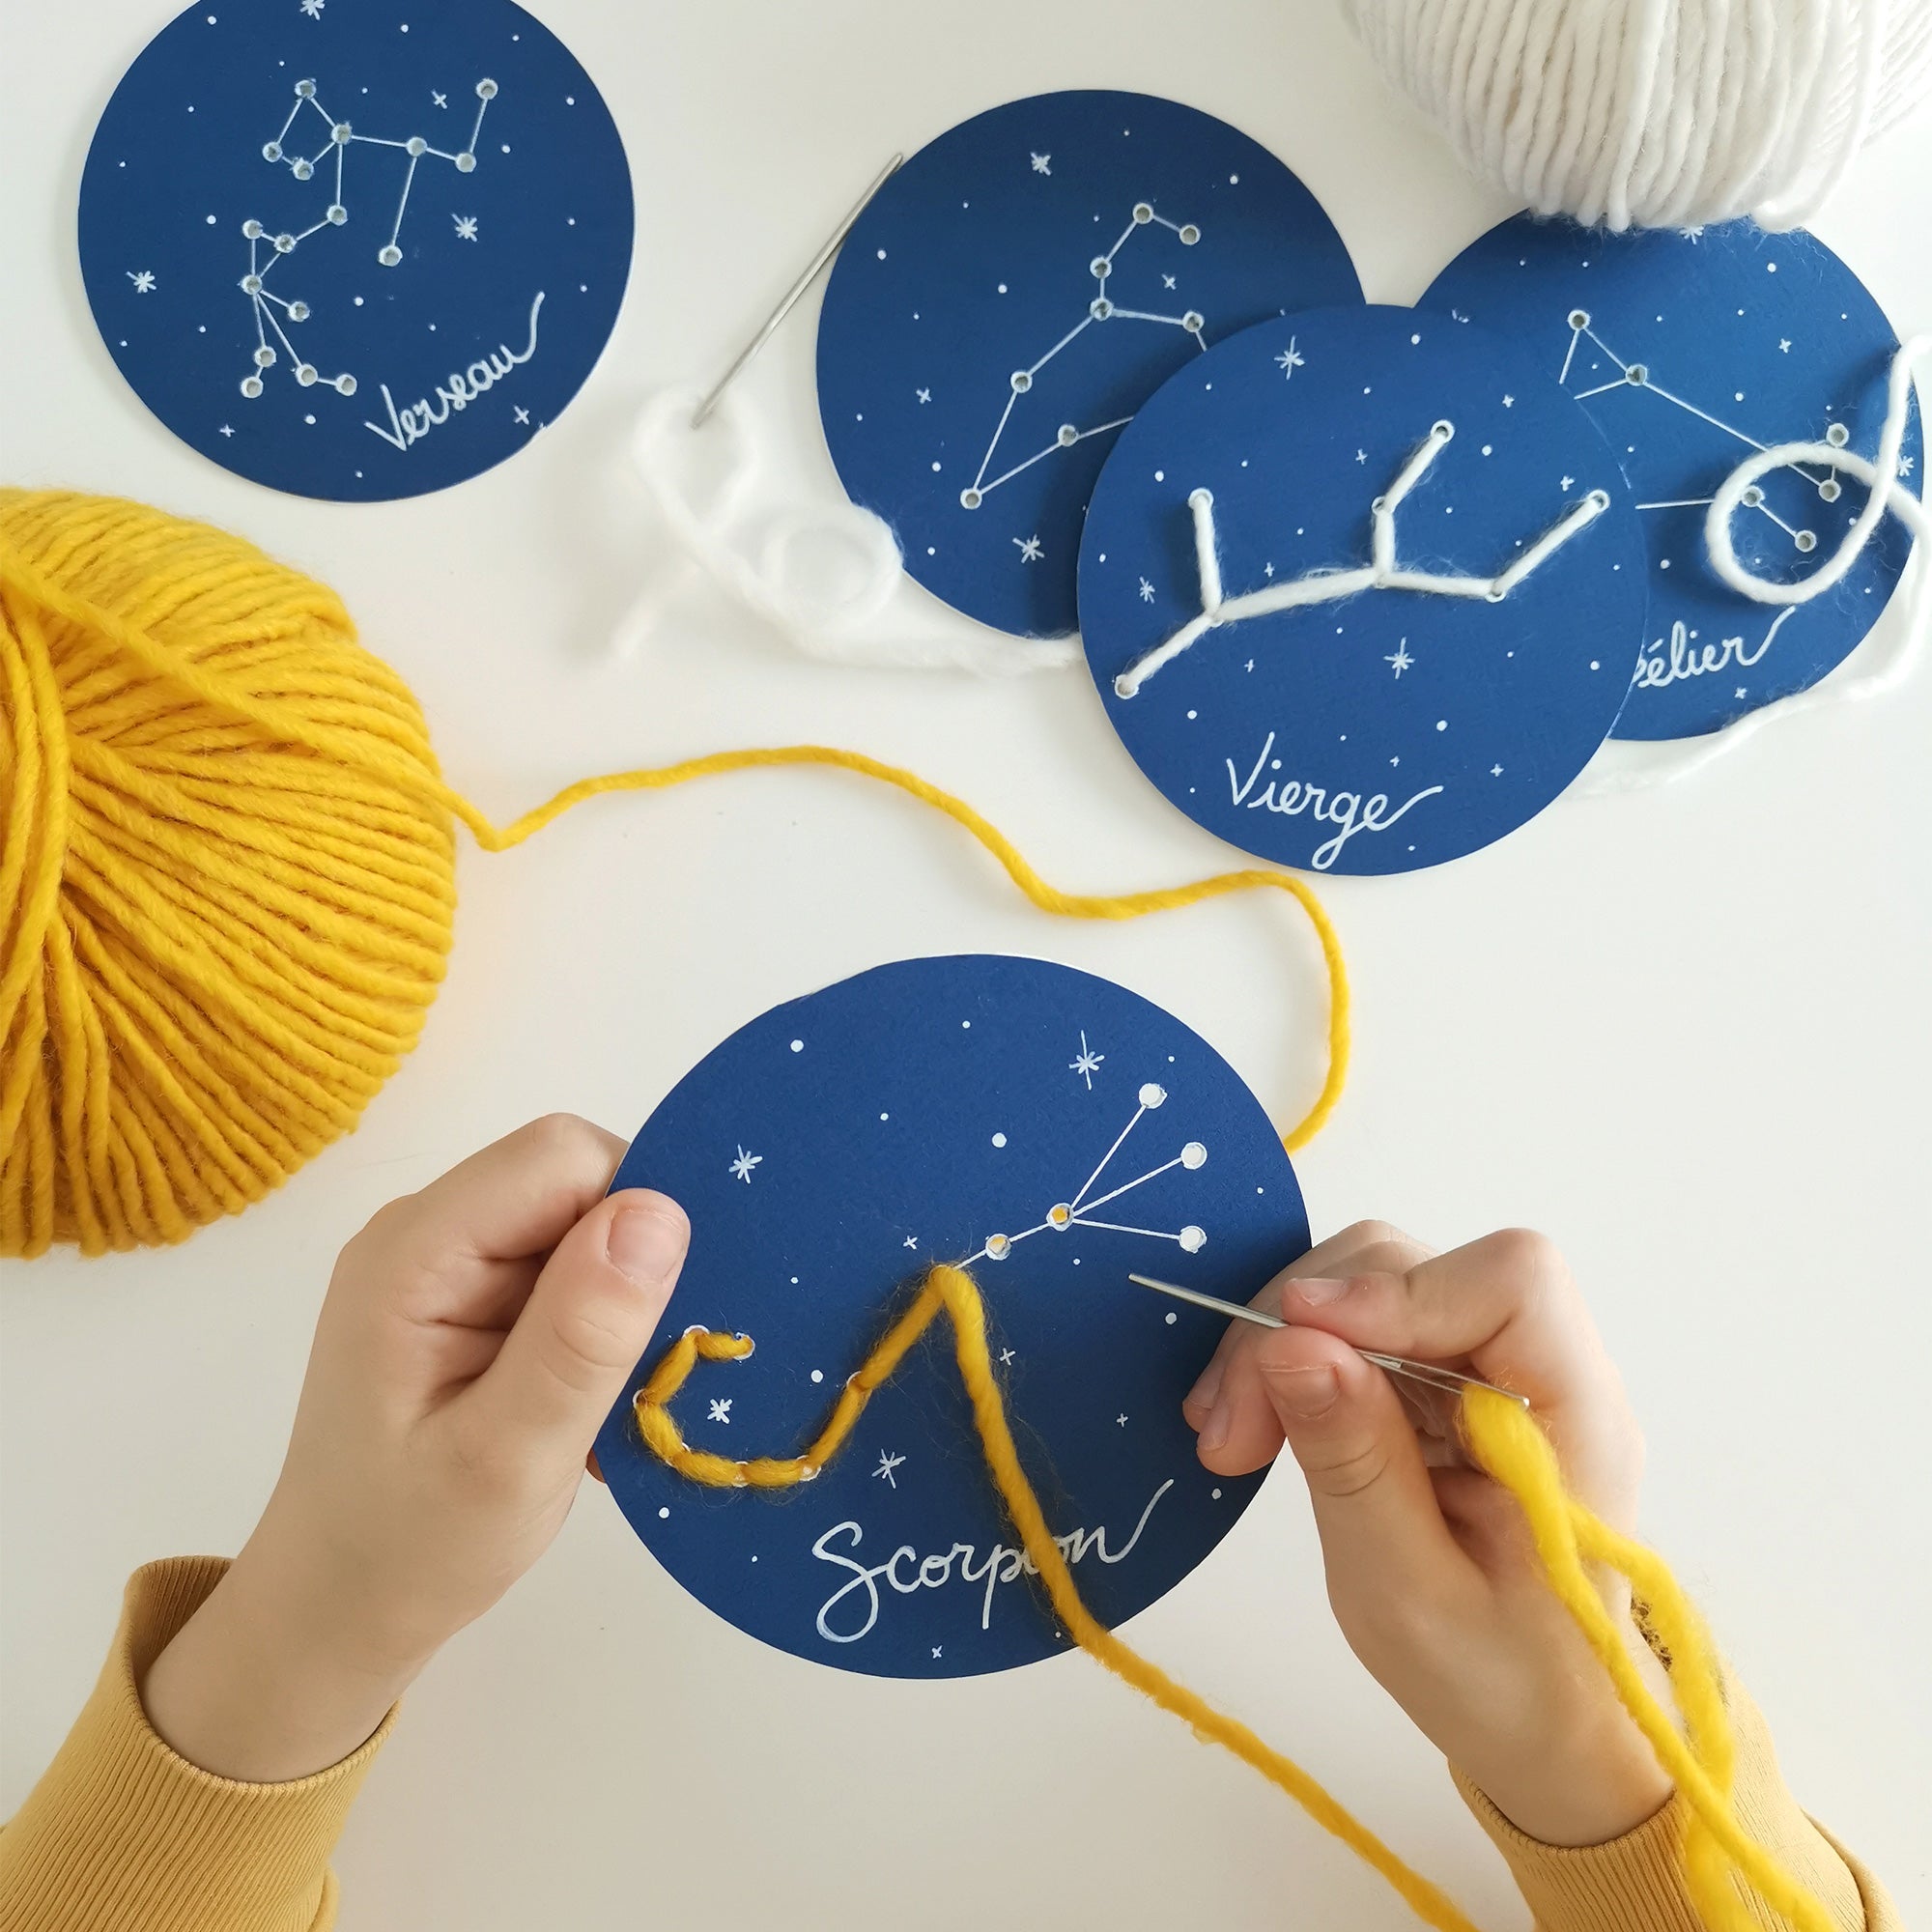
Have fun discovering different constellations with your little artists!
Project by: Chloé Comte
MATERIALS:
- Packaging cardboard from your recycling bin
- Round template of your choice (to draw circles)
- Lead pencil
- Scissors
- Ruler
- Sharp object or large needle (to perforate the cardboard)
- Ultramarine Blue acrylic paint
- Flat brush
- White gel pen or Posca White (0.7 mm)
- Wool (colours of your choice)
- Wool needles
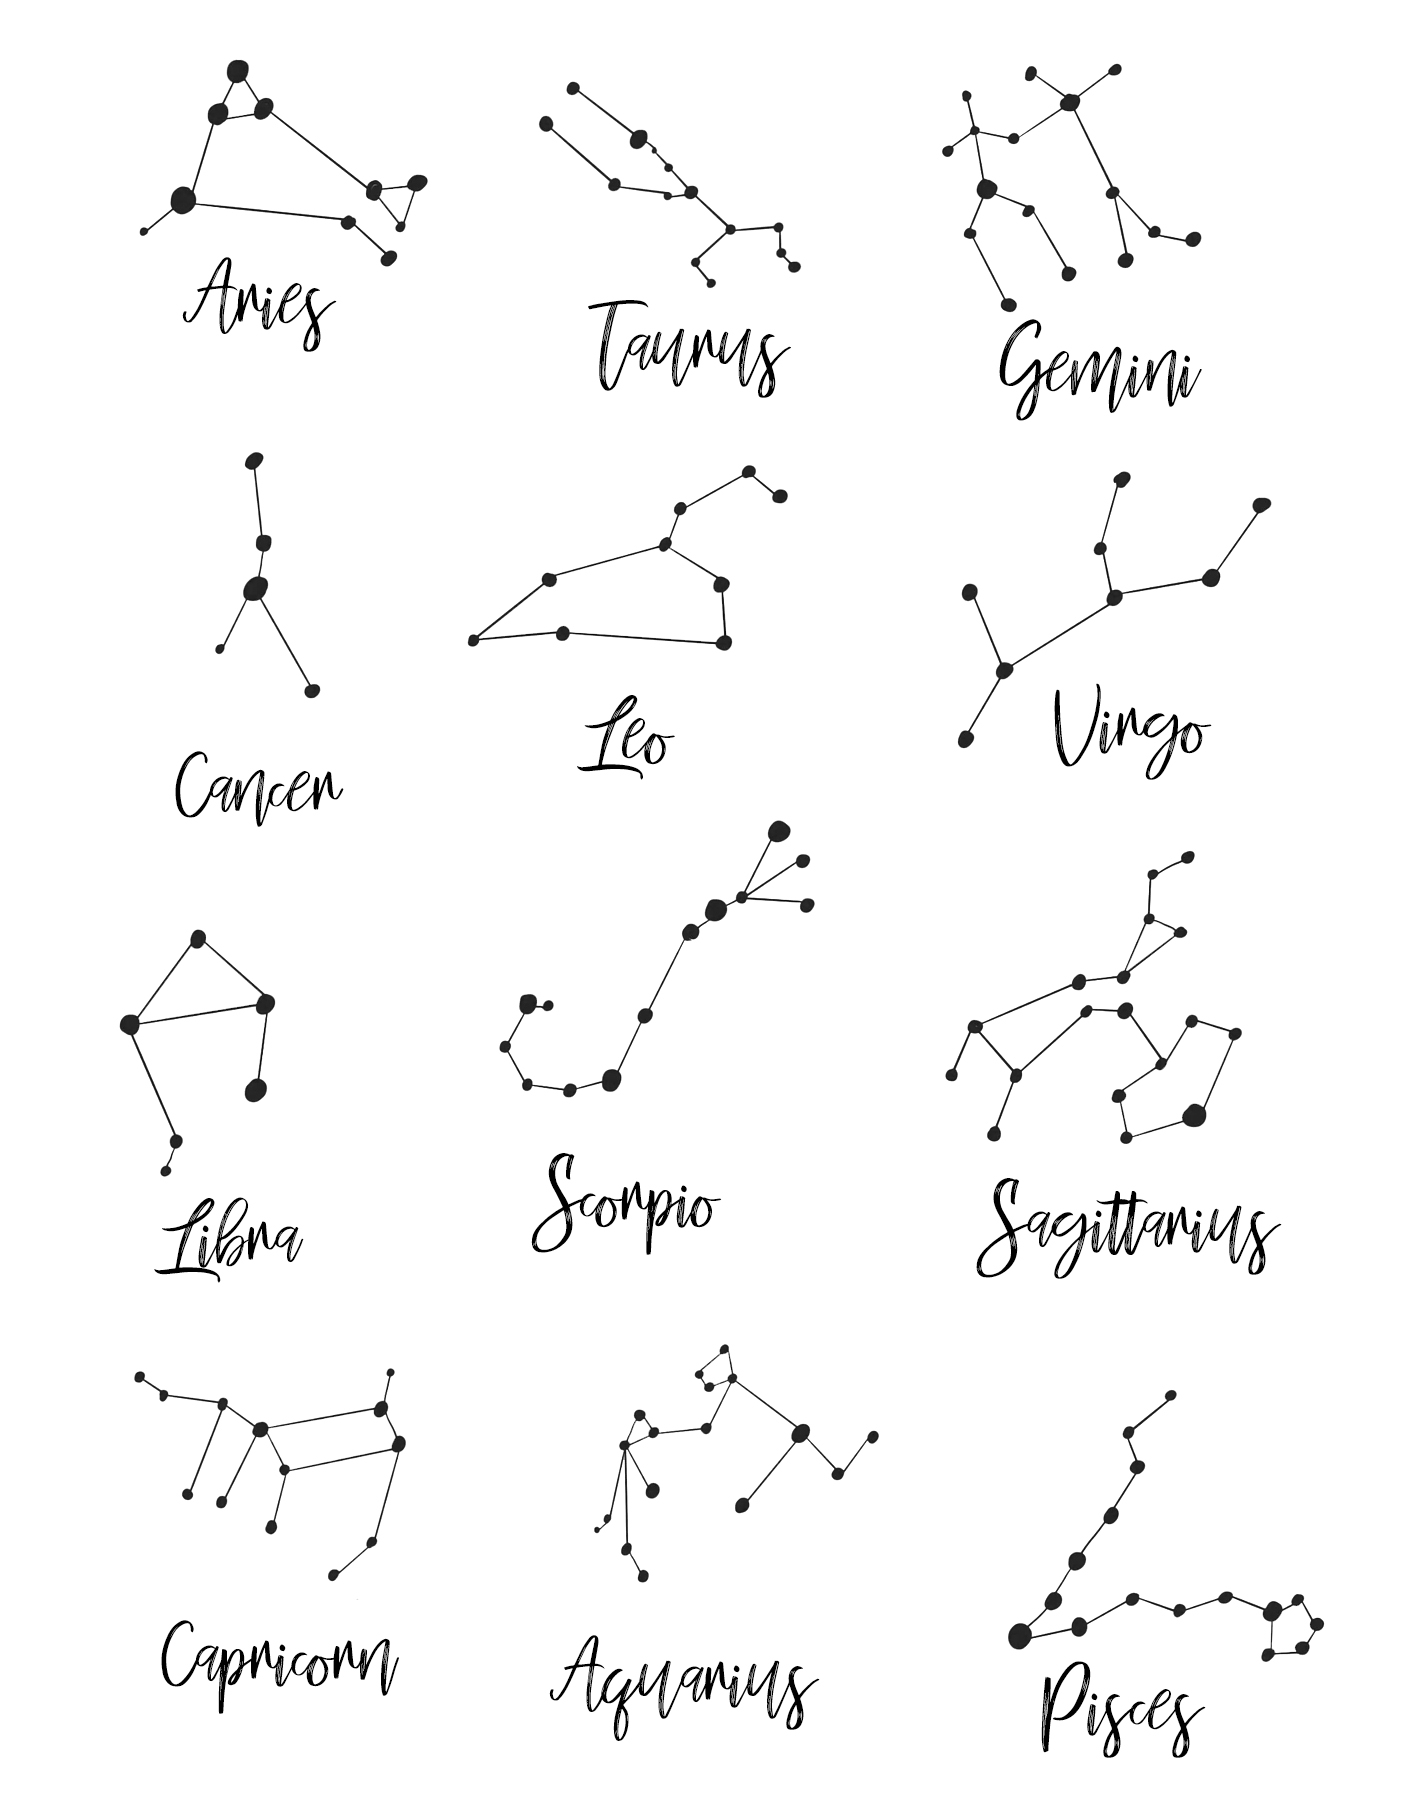
- My constellation sheets (a downloadable gift

INSTRUCTIONS:
Step 1
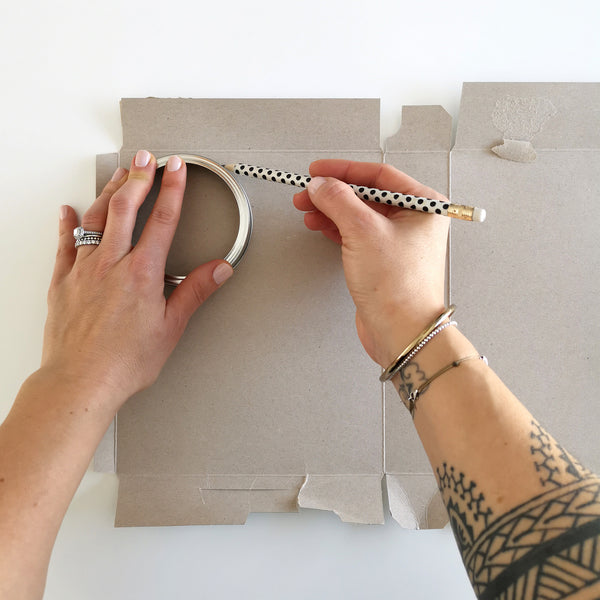
On a piece of recycled cardboard, draw circles using a template and a pencil.
Step 2
Carefully cut out all your circles.
Step 3
Create your cardboard circles using the acrylic paint and a flat brush. You can apply the paint directly to the cardboard, no need to dilute it. Spread two thin coats of paint, letting it dry well between each coat.

Step 4
Once the paint is dry, use the constellation sheet to trace the constellations of your choice on your painted circles. To help with this, you can cut out the template sheet and place your constellation on a circle, thus making it easier to stitch all the dots that make up the star. Then, all you’ll have left to do is connect the dots to draw the constellation.

Step 5
Once the constellation is fully drawn, you can decorate the rest of the cardboard with a white marker and write the name of your constellation.

Step 6
Place your circle on another piece of cardboard to perforate both sides of the stars forming the constellation.

Step 7
Enlarge the holes by gently running your largest wool needle through them. Turn the eye of the needle several times in the hole to obtain nice round holes, big enough to run the needle and wool through.

Step 8
All preparations are complete! Now, all you have to do is thread the needle so your little ones can start embroidering!

