


MATERIALS:
- Backpack
- Spraypaint
- Adhesive vinyl
- Washi tape
- Scissors
- Scrap paper
INSTRUCTIONS:
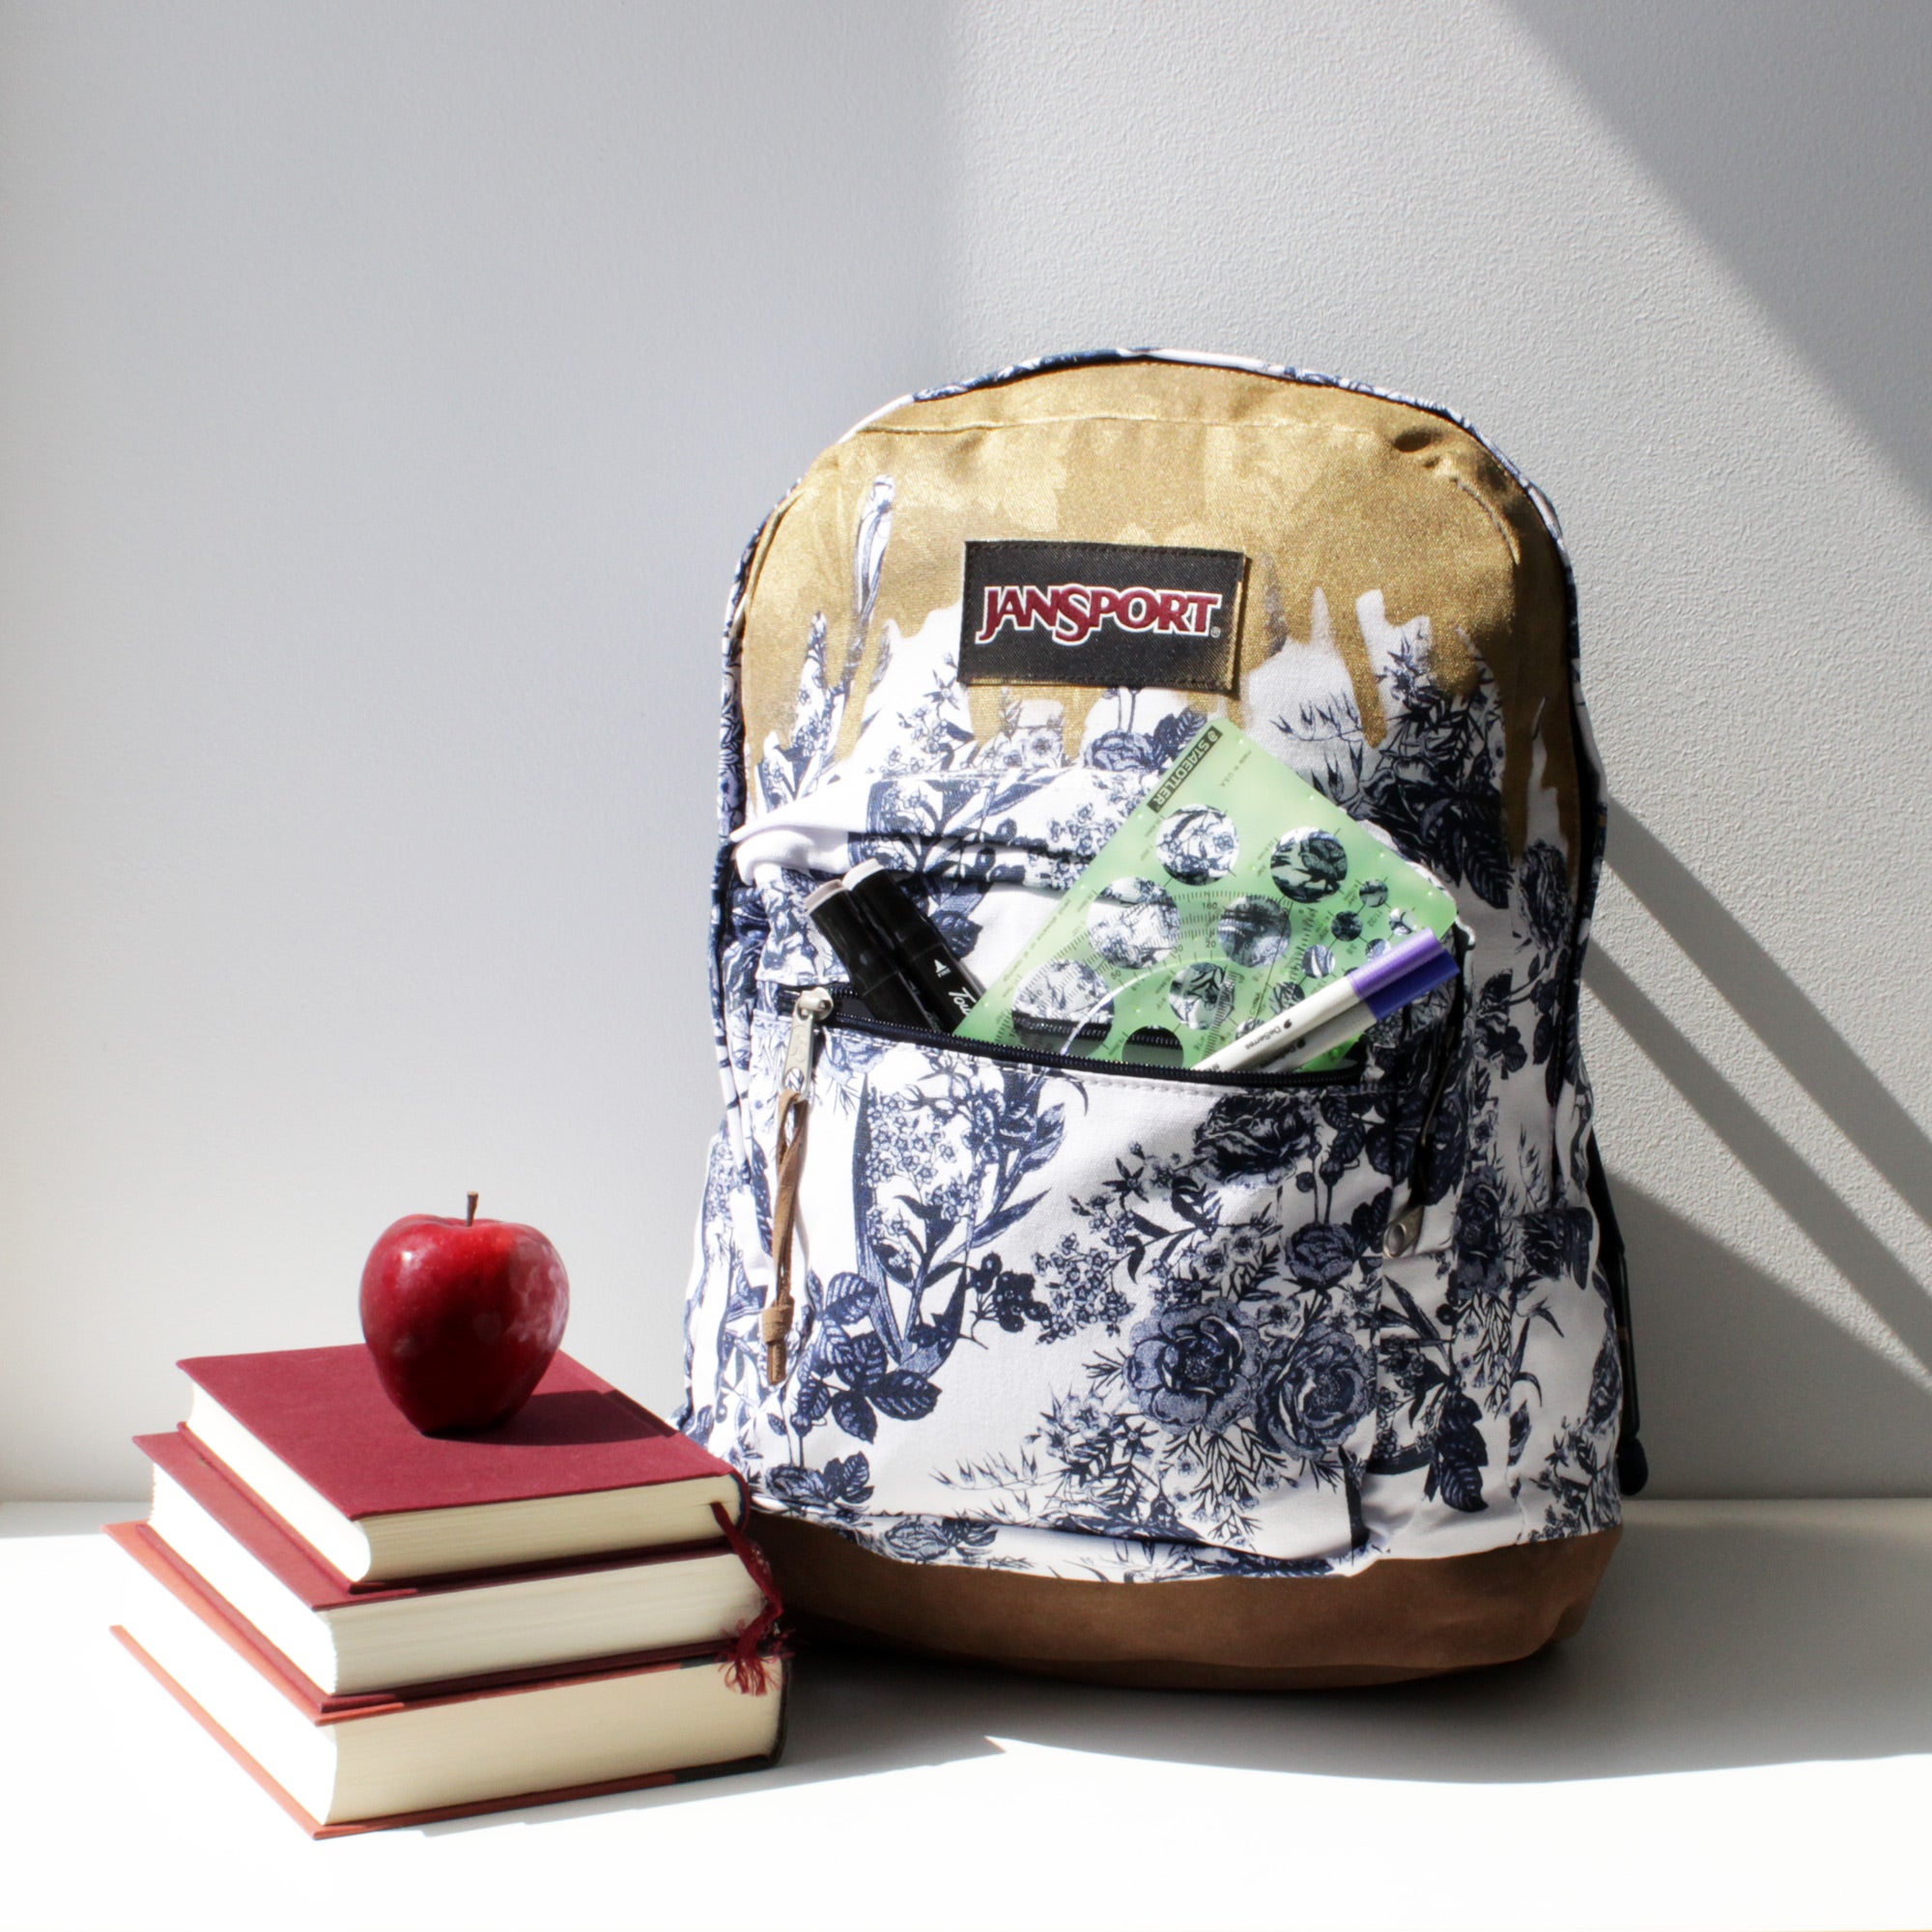
How to spray paint a custom backpack
Step 1:
Stuff the backpack with paper and trace the shape of your backpack onto a sheet of scrap paper. Draw the shape of the drip that you would like to paint. Cut out the portion of your drawing that you do NOT want to be painted. This is your masking guideline.

Step 2:
Cut the shape of your masking guideline (the area of the drip pattern that you do not want to be painted) from a sheet of adhesive vinyl.

Step 3:
Peel the paper backing off the vinyl and stick it firmly onto your backpack, masking the areas that you do not wish to paint. Trim the vinyl if necessary. Mask larger areas of the bag, like the straps and back, with paper. Use washi tape to protect the zipper from paint.

Step 4:
In a well-ventilated area, spray your backpack with several thin coats of spray paint. When the paint is dry, remove the vinyl, washi tape and paper. Admire your trendy creation. Now you are ready to be head of the class!


