


You don't need much more than some paint and a brush to go on a trip through space! Through this fascinating galactic art technique, artist Mélyna Leclerc offers to transport us to the farthest reaches of the universe with every brushstroke. 3, 2, 1, blast off!
Materials:
- A variety of paintbrushes: thick round brush, round shading brush, fine-detail brush, flat round / half-moon brush
- Acrylic paint
- Black gesso
Instructions:
Preparation:
Apply 1-2 layers of black gesso to prime the surface. The gesso allows the acrylic paint to better adhere to the surface.
Once the gesso is completely dry, I recommend sketching on your surface with a lead pencil to better visualize and define the composition of your artwork. You can let your imagination do the work or draw inspiration from actual photographs of outer space. I personally enjoy getting inspired by real images and letting my creativity interpret them.


Step 1
The first step consists of applying a light, semi-opaque or opaque colour as a base layer. Apply your choice of shade in a thin layer and in loose, circular motions with a round brush. It is important to let the black show through your background colour, given that galaxies and nebulae are made of gas, like the lovely clouds in the sky. Some sections can be opaque while others can be transparent, letting the sky shine through. This is the effect that we want to reproduce with our painting of space.
Step 2
Once you have applied your base layer, you can add colours and build on your composition. Apply your colours with a rounded brush using imprecise circular motions to maintain a gaseous effect throughout your artwork.

Step 3
Once the first shade layer is applied, I use a darker colour to accentuate the depth. I like to use Golden’s "Transparent Shading Gray" or black paint diluted with a thinning medium or water to make it more transparent. With this colour, I'll start adding loose shadows in the shaded areas I worked on previously in irregular, broken lines using a fine-detail brush.

Step 4
Once the shadows are done, I create highlights using a lighter colour. It is important to choose a pale enough hue to create a contrast with your other colours. You can simply take the same base colour as in Step 1 and add white to it, or you can opt for a completely different colour. In this case, I used orange, yellow and neon green for my highlights. Be bold and don’t be afraid to play with colours!

Apply the highlights in the same way as you applied the shadows, with a fine-detail brush and loose, irregular movements. I prefer an imprecise line to a straight one because it creates a much more realistic and dynamic effect.

Step 5
You can now move on to the finishing touch— the stars! For each of the different techniques described below, I recommend that you use a fluid paint, such as Golden High Flow, Golden So Flat, DeSerres fluid or any high-viscosity paint that will be diluted with water or a fluid medium.
To create your stars, choose one or more of these different techniques:
- Add stars one by one by dipping a stylus or the tip of a pencil in white paint.
- Apply white paint to a toothbrush and rub your thumb over the bristles to splatter paint onto the artwork in tiny dots.
- Use the Liquitex splatter brush. It’s my favorite tool. I start by creating paint splatters with this brush and then I add stars in different spots with a stylus.
Step 6
To enhance the stars’ luminosity, I like to add a halo with white paint. With a small round brush, apply a very thin layer of paint around the white dot you obtained from one of the techniques described above. Swirl around the star with your paintbrush to create a beautiful, soft, luminous halo.

Tips
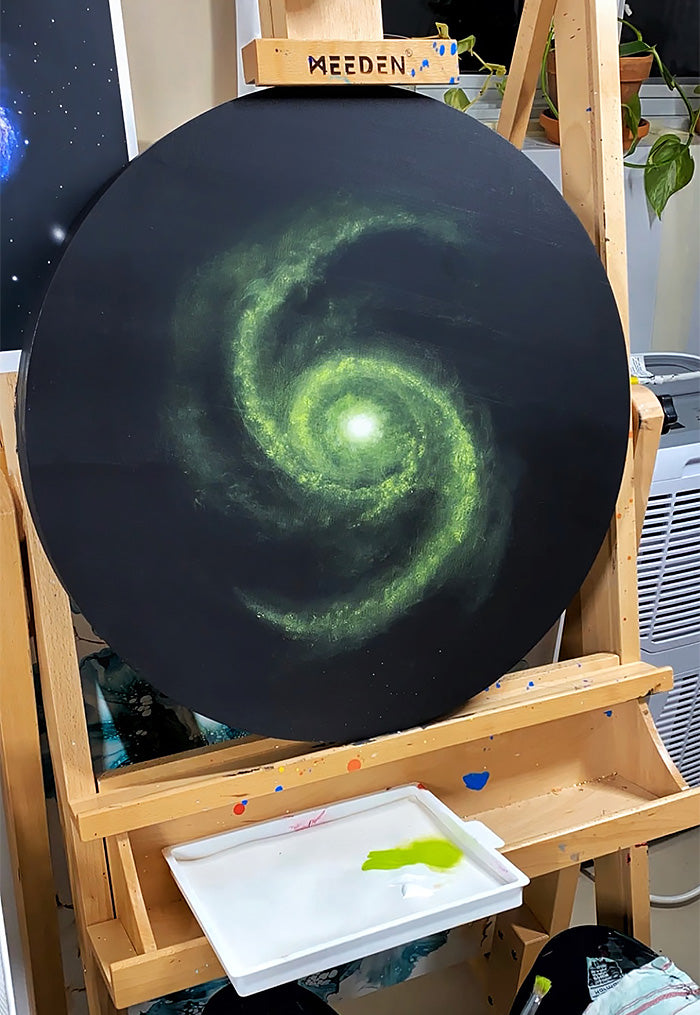
- Background / base colour: Yellow Green
- Highlights: Permanent Green
- Shadows: Black, Transparent Shading Gray
- Light effects: Fluorescent Green, Cadmium Orange, Titanium White, Bismuth Vanadate Yellow
- Stars: White
Reference for images and inspiration:
https://nasasearch.nasa.gov/search/images?affiliate=nasa&page=1&query=Hubble+image