“Simplicity is best, and this is no more true than when it comes to design. I like my art to have space to breathe, and a place for the eye to rest. I want it to be easy to look at. I used only five colours to create this painting, but because there are overlapping transparent layers, other colours appear in the “in between” spaces: greens, maroons and various shades of blue. This is a poured painting, which means that you will be pouring puddles of liquid paint: inks mixed with acrylic pouring medium. You will need to allow ample time for each layer to dry, before pouring the next layer. If you pour one layer over another, the bottom layer will still be wet. This will damage the skin and it will take so much longer for the paint to fully cure – meaning that it will take much longer for the paint to dry enough and allow handling, packing or framing.”
A technique by Claire Desjardins.

MATERIALS:
- DACRYL Pouring Medium
- Liquitex Acrylic Inks (I used: Titanium White, Cerulean Blue Hue, Muted Turquoise, Pyrrole Red, Yellow -Orange Azo)
- Golden Fluid Acrylic (Titanium White)
- Molotow Acrylic Pen (Grey Blue; it’s more of a grey than a blue)
- Liquitex Gloss Varnish
- Canvas (I used a 20 x 24 in gallery wrap canvas)
Other items you will need:
- Containers: one container for each of the colours that you’ll mix. Since I have 5 different coloured inks, I will use 5 containers. Old yogurt containers work well. If you want to blend your colours together, you could have additional containers for the colour blends.
- Spoons: I sometimes use plastic spoons to apply and move the paints around the canvas. If you have an old ladle, it can also be helpful (but not necessary).
This project can get messy, so you may wish to protect your work area and yourself: a drop cloth on the floor and wear an apron or smock. Some people like to wear latex gloves when handling pouring medium.
INSTRUCTIONS:
Step 1: Prepare pouring medium
I set up all my pots, and then I used a ladle to scoop out the same amount of pouring medium. I then poured it into each of my pots. I used one scoop per pot.
Step 2: Mix inks
Add a few drops of ink to your pot of pouring medium. The more ink you add, the less transparent it will be. I used about 6-8 drops of ink per container. Stir until the mixture is smooth and even (not marbled). I like to prepare all my colour pots at the same time.

Step 3: Pour coloured pouring mediums
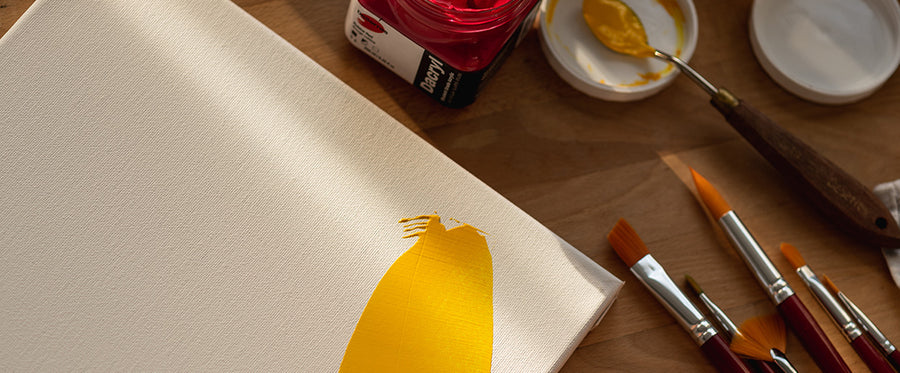
Choose your base colour. I find it helpful to use the darkest colour on the bottom layer, as it will show through lighter colours that I will pour on top. Slowly pour the tinted pouring medium out of the container and onto the canvas.
Use a spoon to gently move the mixture around. If you press too hard and create a dent in the mixture, you can use the backside of the spoon to try and smooth it out again. Pouring medium will self level to a certain degree while it’s still fresh, if you just help it along a bit at first. If you wait, the acrylic medium will form a skin, and you will damage it if you touch it. So, best to make any adjustments while it is still freshly poured, and still very liquid.
Once you’ve moved the medium around the canvas with the spoon, sometimes it helps to tilt the canvas in different directions, so that gravity pulls the paint down across the canvas, smoothing out any further ridges along the way. Be sure to tilt the paint in all directions and keep an eye out for potential stray drips. The drips can be interesting, but if you are looking to create a perfectly smooth, rounded shape, you must watch carefully!
Set aside and lay flat to dry so that the puddle of medium doesn’t flow off the canvas.
Depending on how thick the paint is and how humid the air is, it should take about 24 to 48 hours to dry. If it’s very thick, it could take longer. Set your canvas aside in a place where it won’t get dusty, or accidentally be touched before it is fully dry.
Once fully dry, add your next colour. Try overlapping the edge of the bottom colour to create new, exciting colours. Use the spoon to move the paint around, making the fresh mixture as even as possible.

Again, set aside to dry (probably overnight).
Add the next colour using the same techniques (the spoon to guide). Again, set aside until this layer is fully dry.
Repeat this process until you have applied each of the desired colours.

I added yellow, and then red, after having let the layers dry in between. I added white last, using my spoon to move the medium around.
Once all the layers are on your canvas, set the whole thing aside to cure (at least 24 to 48 hours).
Step 4: Sign your painting
When dry enough to touch, sign your name using an acrylic pen. I like to use neutral colours, such as a grey acrylic pen (neutral colours don’t fight with the rest of the painting). I love using acrylic markers because my signature tends to be more legible.

Step 5: Varnish
Protect your masterpiece! I like to varnish my artworks so that they are protected from scuffs, scrapes and dirt. It’s important to do your varnishing in as dust-free an environment as possible.
Pour the varnish into a container, being careful not to splash it around (which creates unwanted bubbles). If there are bubbles floating on top of your varnish, let it sit a while to settle. Stir your varnish to ensure that it’s a nice, even consistency. Use a soft brush to carefully apply the varnish; start with one thin layer. Again, try to avoid bubbles (you can gently blow on them or use your brush to smooth them out). I like to apply three layers of varnish, and I apply each layer once the previous one is completely dry.


