


Tie-dye is still trending this summer – and it’s definitely here to stay! That’s why we’ve put together a handy guide to explain the various knotting techniques, so you can master them to a T. And with our complete Jacquard Tie-Dye Kit, you’ll be able to create really cool projects!
INSTRUCTIONS:
Before you begin customizing your clothing using the tie-dye technique, here are some key steps to follow to ensure you get the best results:
Step 1
Prepare your work surface by laying out a plastic sheet to protect it.
Step 2
Wear gloves for the next step.
Step 3
Pour baking soda into a bucket filled with two gallons of hot tap water. Stir to dissolve. Add the t-shirts to the mixture and let soak for 20 minutes.
Step 4
Fill the dye bottles with hot water to approximately ½ in from the top. Put the caps back on and shake to mix.
Step 5
Wring out the t-shirts to remove the baking soda mixture. Do not rinse.
Step 6
Tie the t-shirts so you can dye them according to the steps in the guide below. Don’t worry, no method is wrong, just trust your creativity!
Step 7
Once the dye is applied, place the t-shirts in a plastic bag or wrap them in plastic. Let stand for 12 to 24 hours. Rinse with cold water.
Now, let’s learn how to make stylish designs!
Technique #1 - Small Knots
You can create a mini knot design by laying out your fabric and tying small bunches around the surface with rubber bands.

To ensure your results stay true to the name of this technique, we recommend spacing out two rubber bands to create two circles on each mini knot.


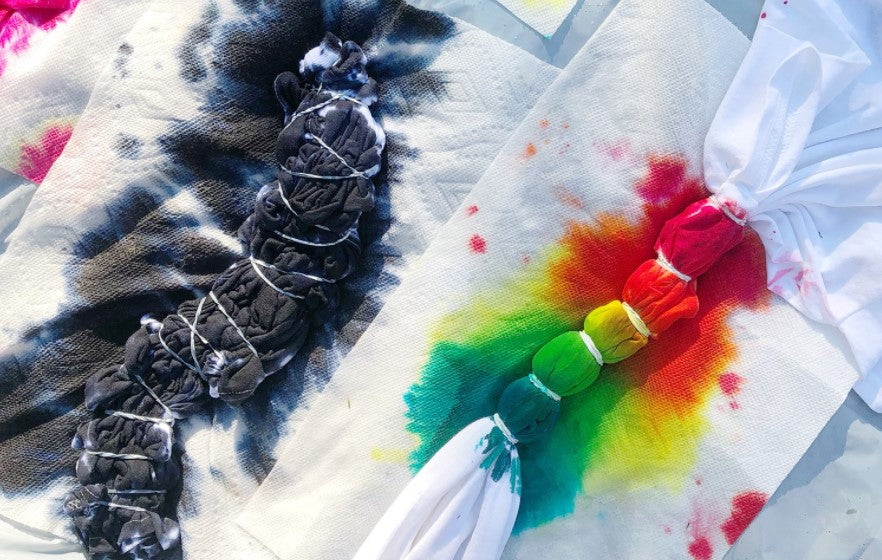
Technique #2 - Crumple
The crumple design is one of the easiest to create. Simply crumple your fabric toward the centre to form either a long snake shape like the one shown here, or a well-crumpled round ball.

Crumple your fabric well in all directions and secure the folds in the right places with rubber bands.


Technique #3 - Rainbow
The rainbow design is really fun to create and it’s not as flashy as the other techniques. Start by drawing the top and bottom of your rainbow on dry fabric.

Next, pleat the fabric in a fan-like pattern along each of the two lines, so that each drawn line begins to appear on the top of your pleats.

Once all the fabric on the arch lines is gathered, secure it with rubber bands along each of the lines. Then, add more rubber bands randomly between the two outer lines to clearly identify each colour of your rainbow.


